1.1
 |
| Omni-Directional Mic |
Considerations need to be made when recording different types of audio. In general when recording voice audio you want it to be as clean as possible without any background noise. Because of this you would most likely want to use a directional mic to avoid picking up surrounding noises.
Shotgun mics are a good solution to this. Live event recordings can often be tricky as there are an abundance of noises that can be picked up by the mic and distort the audio you actually want to record. If there is a speaker system, a directional mic with a good frequency range and levels turned right down, sat in front of a speaker may be your best bet at clean audio.
That is if you're unable to directly hook a capture device straight up to the speaker system. Recording environmental sound is usually much easier than the other two scenarios. And omni-directional mic could be used with a 'dead cat' to stop any wind noise if recording outside.
Reverb can be a major problem if not dealt with pre-recording. Shotgun mics with an enclosed sound booth are a really good option as the sound booth pads the ambient noise reflecting into the mic and also directly blocks and sound reaching the mic other than from the source you want to record.
Another mic you could use would be a lavaliere mic which are generally used in interviews and are clipped onto a person's tie or collar to pick up their voice. They can often pick up surrounding sounds so it's generally a good idea to use them in a quiet environment or one where the background noise isn't too distracting.
 |
| Lavalier Mic |
 |
Dead Cat
|
 |
Microphone sound pattern
|
 |
Shotgun Mic
|
1.2
When recording material to be broadcast later as an 'as live' transmission, there are several things that should be considered pre recording and in post. Depending on where you're broadcasting to and to what audience you should always make sure that the content is suitable. This could be the type of language that's being used, the actual topic of discussion and whether there is accuracy in what's being said. It would be a good idea to draft/create a script so there's no confusion and those involved know what's going to be said. It can also make individuals feel more comfortable because they don't have to worry about remembering things. This is turn can make for a better recording as these individuals may sound more calm and their speech would flow better as a result. To add to this, actually rehearsing before recording can help with making someone feel more comfortable due to them knowing what's to come. Another thing to look out for before/during recording are recording levels. You should ensure that these are just right so that there is no audio clipping and that the volume isn't too quiet. If you have either of these problems is can be very difficult or even impossible to rectify in post without seriously affecting quality.Post production is an opportunity to clean up the audio you have previously recorded. This can be done in many different pieces of software however I usually use Adobe Audition. In Audition you're able to cut, silence and remove unwanted sounds quite easily. To make your recording seem really good quality you should remove unwanted background noises and string the voice recordings together to remove pauses and any 'urm's. This makes the recording flow much better and will sound much better for your audience. If you intentionally recorded at low levels then you can also up the gain in post to make the recording louder while still retaining most of the quality and removing much of the background noise.
1.3
Condenser microphones are most popular when recording in a studio. They produce a wider range of frequencies and generally have better audio quality. Along with a wide frequency range, condenser mics are very sensitive to sound. These two features mean that they are mainly used for quiet dynamic instruments which don't give off a lot of sound. They're also very good for voice recordings. Extra power is needed for a condenser microphone to work. They pick up sound from all around and are therefore omni-directional which is useful if the sound you're recording has a tendency to move around.
-Large Diaphragm microphones give a fuller/warmer sound so are better for voice audio. -Small Diaphragm microphones give a more balanced sound with perfect detail. -Both types of microphones require popo filters due to being so sensitive to the pop sounds when speaking.
Dynamic microphones are more tolerant of louder instruments. For this reason they are often used on louder drums. They're also used at live events due to their lower sensitivity. Being direction is also beneficial at live events as it's less likely to pick up surrounding audio. Their frequency response isn't as wide as condenser mics.
Accessories like pop shields and 'dead cats' are used to eliminate any unwanted sounds in a recording. Pop shields reduce to pop sounds that are made when recording vocals and 'dead cats' are a fur-like cover that reduces the wind noise that can be picked up by the mic.
Audio quality is very important when recording sound and there are various formats that provide different amounts of quality. For uncompressed audio you would use the .WAV format. This is a lossless format and gives the best quality recording from a mic. Another good format is .mp3. While it is a lossy format it can still give a very good quality sound and is best at 320kbps. The difference between the two formats is that the data nearer the very low and very high frequencies is different for each. WAV has this data present while the mp3 loses it due to the compression it has. This extra data in .WAV comes at the expense of file size. This greater frequency range sounds much higher in quality and those with a trained ear can distinguish between lower and higher quality songs.
1.4
Many recording devices can have their gain changed to increase/ decrease the volume of the recording. Manually changing the levels is useful when you're in an environment where the volume of sound is fairly constant. Automatic level control an also be useful when in environments that have changing levels of noise Both options have their limitations though. With manual the sound recording would need to be fairly constant because too low a sound and it'll be hard to hear or too loud a sound will clip the audio and cause distortion. This is where automatic levels work well. Automatic can however introduce problems such as background noise. This occurs because when there is a no sound being picked up, the device will increase the recording levels in an attempt to compensate. This introduces the background noise. For sudden loud inputs of sound the device will do the opposite of before and reduce the levels. This can give momentary silence while the levels are attempting to readjust. All these issues can be very difficult to recover and/or hide in post production so it is always best to get it as close to perfect as possible pre-recording.
2.1 - 2.7
We recently did a shoot for Buttercups where our main focus was capturing good quality audio. We had a few possible pieces equipment at our disposal but ended up deciding to use a Lavalier mic into a camera and Tascam D-40 via a wireless transmitter and receiver.
 |
| XLR to 3.5mm |
 |
| Equipment used on shoot |
The Tascam has an XLR input while the wireless receiver has a 3.5mm jack output. this means that an XLR to 3.5mm adapter is required. All the pieces of equipment we used were powered by AA batteries and no microphones were used that require phantom power. The Tascam can output 48v phantom power but was not required during this setup. Because our subject was going to be stood up and moving around during his presentation we decided it was best to use a lapel mic with a transmitter. This lavalier mic is a condenser mic which has omni directionality. It's frequency response is 80-18k Hz and while this is not the greatest it is sufficient for voice recording. As you can see from the picture above we have two receivers. One of the receivers was connected to the Tascam while the other was connected to the Canon 5D mkIII. On most shoots we just record into the camera however I decided we should try the Tascam due to it's better recording quality. The pre-amps in the Canon can give a lot of floor noise which is not what you want in a high quality recording. The Tascam also gives you the opportunity to carry on recording while you're not filming which can be useful if you need to change flash cards or a battery. Below you can see the setup that was being used for both the Tascam and 5D. The audio splitter attached to the camera was just used as a mount for the receiver and Tascam in this scenario.
 |
| Wireless receiver connected to Tascam |
 |
| Wireless receiver straight into DSLR |
 |
| Levels were checked with headphones and were set at 35/100 with two tracks recording meaning that if any clipping were to occur we have a quieter, cleaner, -8db track that can be used in place of the normal 0db |
Our brief outlined that we were going to be recording someone giving a PowerPoint presentation to an audience. It would be an all day shoot from 9 - 5 but may end earlier depending on how much progress was made. Our crew consisted of myself and coworker Dave. We were both operating a camera each and I was also operating the Tascam. Because it was an all day shoot we needed a good number of flash cards so that we had enough recording time for the whole presentation. We were told which slides definitely needed to be recorded and which ones weren't needed. The ones that weren't needed were ones where the presenter was interacting with the audience. This is because the final destination for the voice over will be an online presentation and interaction with an audience would be distracting/confusing to someone who was watching. Because we were recording a voice over and we wanted as high quality as possible, so our recording format (into the Tascam) was uncompressed WAV with a 44.1kHz frequency range. This gives us some good quality audio to play with in post but also keeps the file size to a reasonable amount so we can record a good amount on the shoot. At these settings we had around 4 hours of recording with a 16gb SD card. Although it would have been better to record constantly I decided that to make life easier when syncing audio in post I would stop and start recording at the same time as I would with the video. This would mean that there would be the same number of audio files as there were video and that matching them up would be much easier. Each audio file was named 'tascam_xxxx' which followed sequentially so file names weren't all over the place. The room we were recording was quite good in terms of reverb and external noises. Because there wasn't really a possibility for re-recording due to the presentation being a paid event for the attendees we had to minimise any possibility of the audio being interrupted. All mobile phones were kindly switched off and a sign placed on the door ensuring no one would disturb us while filming. After we eliminated those possibilities we were left with the problem of the projector's fan making a constant noise. Due to the nature of the lavalier mic and it's ability to pick up sound from all directions in a given radius, we could hear the projector for the majority of the recording. This was a variable out of out control but could be easily sorted in post using Adobe's program Audition. On the day it was necessary that we didn't pose any health and safety risks to the people that were attending the presentation. To minimise any risks of trips and falls we kept all carry cases and equipment we weren't using tucked away under a table at the back of the room. As for the equipment we were using we were fortune enough to be at the back of the room out of everyone's way. We were able to do this because of the wireless mic system we were using and the selection of camera lenses we had to hand so we could get a good shot from a distance. There were no trailing cables around us and the only piece of equipment not in our direct control was the mic the presenter was wearing. The potential hazard here would be a electrical malfunction however the device was in fully working order and there were no points in which a electrical current could be discharged.
3.1 - 3.3
Like previously mentioned, the room we were in to record the presentation was quite good acoustically. When we entered the room the first thing i did was click my fingers to see how much echo we got in the room. There was very minimal reverb due to the amount of soft furniture and large curtains that was in the room and the sound isolation from outside was very good also. Because we were indoor there as very little we couldn't control. Nobody's phone was on that could cause a disturbance and there were set times for catering to come into the room meaning no-one would be opening and closing doors while the recording was taking place. The only problem we did face was the projector 'humm' which was noticeable throughout the recordings but was quiet enough to not be distracting. This could be later fixed in post using various noise cancelling methods. Due to there being no speaker system there wasn't any problem with feedback being produced. This usually occurs when the speakers are loud enough that the mic can pick up the sound and creates a high frequency loop. To avoid this you should use a mic with a small sound pickup area or have the speakers quieter.
As for background noise there's a specific step you can take in your recording if you want to minimise this noise in post. If you take a floor noise sample of room without anyone making any noise, you can take that recording and have a program like Audition analyse it and then remove it from the audio you want to use. The louder and more prominent the background noise is the harder it is to remove in post so it always a good idea to minimise it as much as possible when recording. You can do this by trying to eliminate any external factors like closing doors and windows to stop ambient noise leaking into the room or you could invest in a quality pre-amp which will give you much cleaner recording from you microphones. When setting up the microphones themselves you should ensure that they aren't going to be disturbed and that any chance of knocking them or ruffling up against them is dealt with. For the Lavalier mic we used we placed it onto the presenter's tie in a way that was going to minimise any disruption. The mic was pointed toward the subject's mouth and the cable was organised in a way that made sure that if it were to be pulled it wouldn't pull the mic off or cause any unwanted noise. Below is a picture that resembles the cable setup.
 |
| Lavalier mic setup |
The presenter was dressed in just a shirt and tie so there was no trouble dealing with a jacket which may have caused some unwanted noise. The mic also wasn't directly next to his mouth so there wasn't any need for any pop filters. If we were in a scenario where a mic was pointed directly at the subject this it may be necessary to use on of these pop filters to reduce the 'p' and 'b' sounds that are produced when speaking. Also if we were recording in a location outside that was windy then it would be beneficial to use a dead cat or even a blimp attachment if it was creating a lot of noise. You can sometimes run into a problem where vibrations and impacts can be a concern to the clarity of your audio. Our subject wasn't moving around too much so there wasn't any need for shock dampening. However if we were using a boom pole then is might have been a good idea to use a shock mount so no vibrations from your hands are transferred to the mic. There was no problem with dealing with papers moving and rustling because our subject was using a PowerPoint and had rehearsed a script beforehand.
 |
| Blimp mic attachment with dead cat cover |
 |
| Shock mount with attached pop filter |
On all shoots we have a backup plan incase some of our equipment fails. For most things we have two of them. For instance if one of our mics stop working then we have a second that we can use in it's place. The same goes for receivers an transmitters. We did however only have one Tascam so there wasn't much of a alternative there. If it were to fail then we would have to revert to recording into camera which would impact our sound quality. All our equipment is battery operated so we always ensure that we have spare/new batteries available if we were to run out of juice in one of the pieces of equipment.
We did initially have a problem with the levels going into the camera just after we set everything up. It was unclear what was the issue but after checking the settings on the camera, receiver and transmitter we discovered that the receiver was outputting levels at +10db which was giving us a very distorted sound. This was quickly rectified by changing this output setting to 0db.
4.1, 4.2
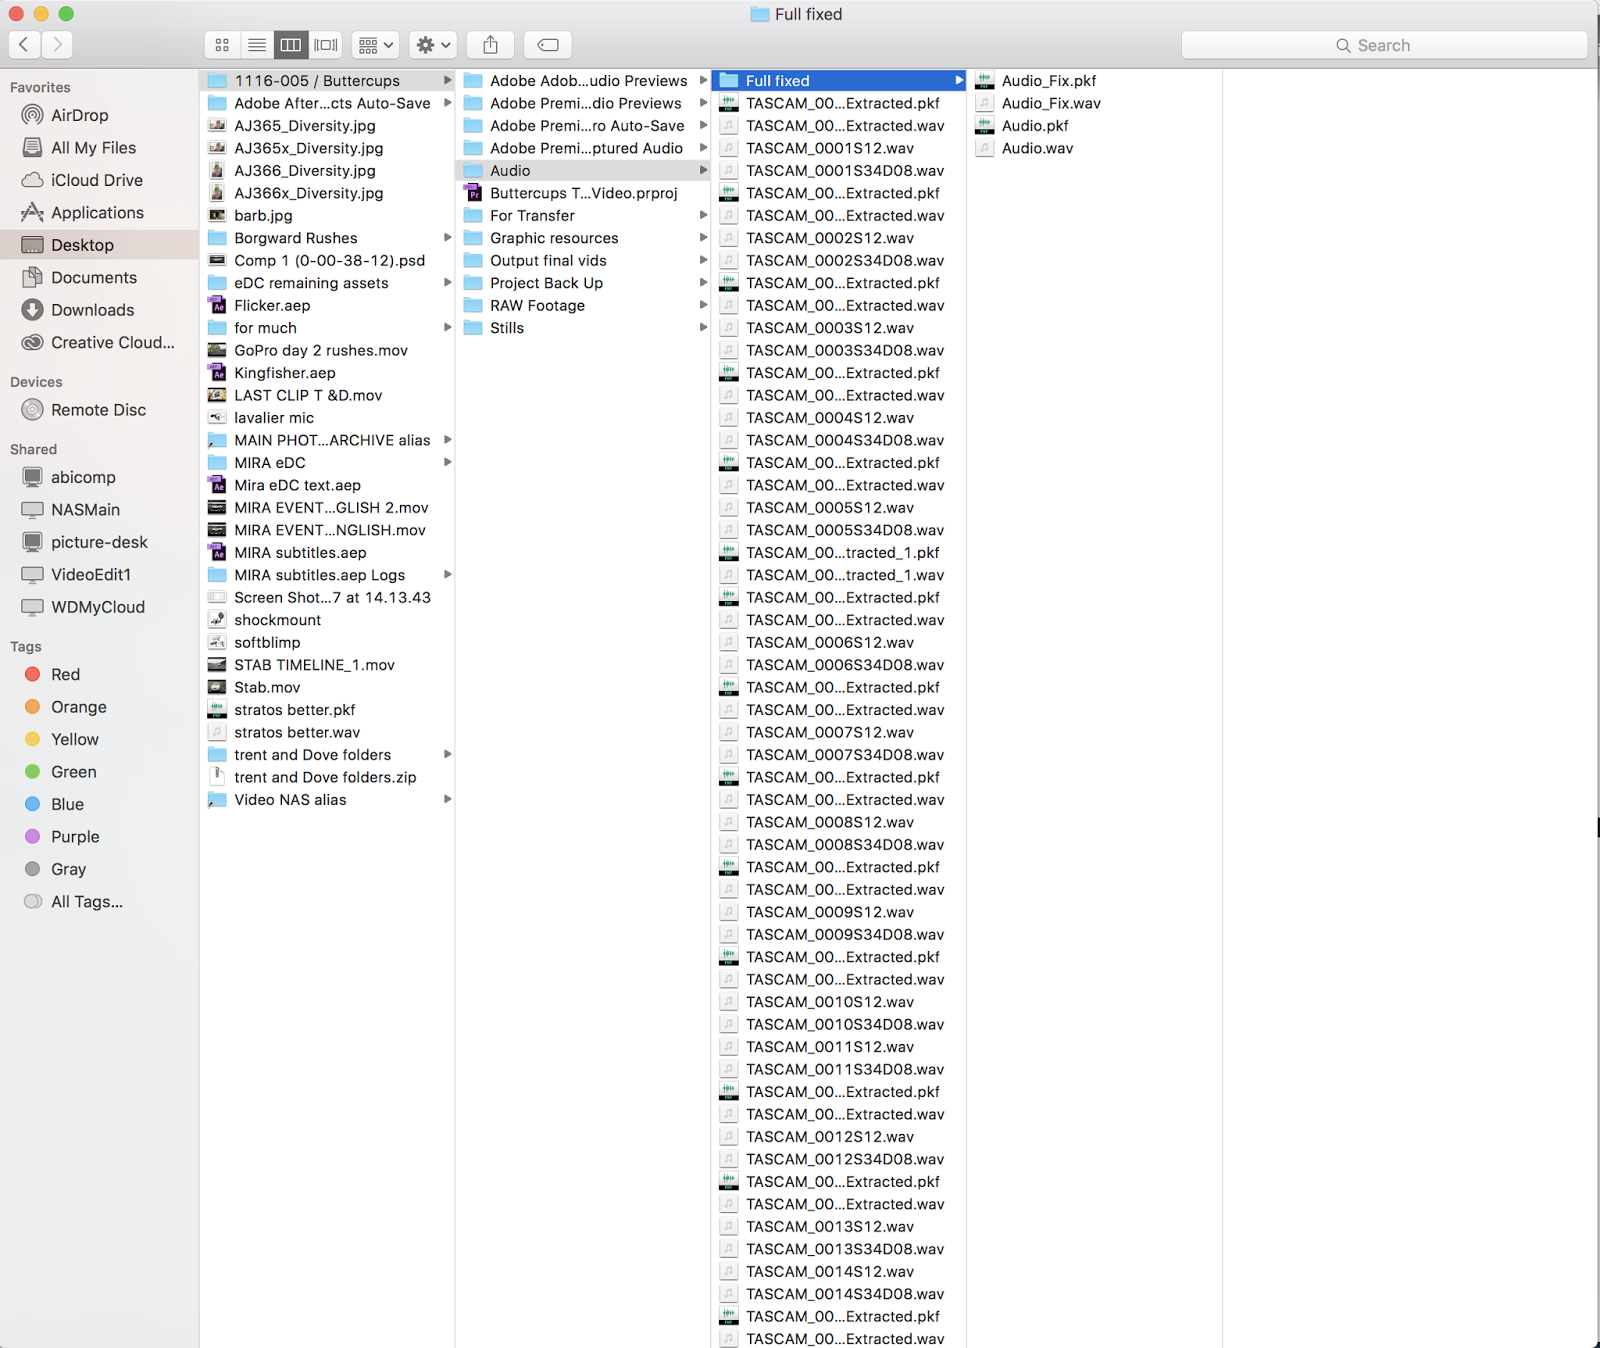
It's always a good idea to make sure that your audio files are named and categorised correctly. You can see in the screenshot below that the files are named sequentially (Tascam_xxxxS12) You can also see the -8db track next to each normal track. Because of this sequential naming and the fact that the video was started and stopped every time the audio was, it was fairly simple to sync the audio with the video clips.

Below you can also see that the audio files are kept organised in the project folder. Any audio that has be altered/fixed always ends in '_fixed' so it can easily be distinguished.
No comments:
Post a Comment